

How To Download Pictures From Iphone To Snapfish
Z7_3054ICK0KGTE30AQO5O3KA30N0
hp-concentra-wrapper-portlet
![]() Actions
Actions
HP PCs - Using HP Connected Photo to Work with Your Photographs (Windows 8 and Android)
This document pertains to computers with Windows 8 and to Android devices.
note:The HP Connected Photo app is being replaced with the Snapfish app in June 2015 in limited countries. The information about HP Connected Photo in this document is not current. For more information see HP Connected Photo Is Being Replaced with Snapfish.
HP Connected Photo makes it easy to find, create and share your photos, wherever they are and from whatever or service you use.
Installing HP Connected Photo in Windows 8
To install HP Connected Photo, use the following instructions.
note:Windows RT devices with ARM processors, are currently not supported by HP Connected Photo.
-
On the Windows 8 Start screen, click the Store tile.
Figure : Store tile

-
In the Store, type HP Connected Photo and click the magnifying glass to search.
Figure : Search

-
In the results list click HP Connected Photo powered....
Figure : Results

-
Click Install and follow any on-screen instructions.
Figure : Install

When the app is installed, you get a message that says Your apps were installed.
You are now ready to use HP Connected Photo.
Updating to the latest version of HP Connected Photo
HP recommends updating HP Connected Photo when there is an update available. The app is updated occasionally, and to get full functionality and features, you need the most recent updated version.
note:Beginning with the introduction of Windows 8.1, HP Connected Photo automatically updates itself to the most recent version. The following instructions are for those running the previous version of Windows 8 and using the HP Connected Photo compatible with Windows 8.
To update HP Connected Photo in Windows 8, use the following instructions.
Updating version 2.0
If you have HP Connected Photo version 2.0, use the following instructions to update to the latest version:
-
Click the Store tile.
Figure : Store tile

-
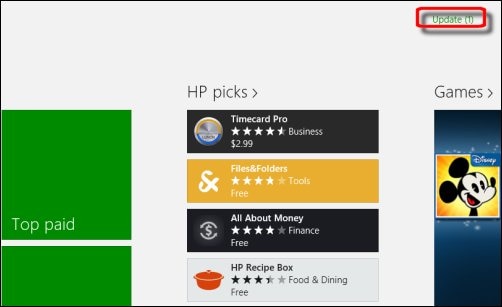
If there are any updates available for any of the apps installed on your computer, Update displays in the upper right corner. Click Update.
Figure : Update(s)
-
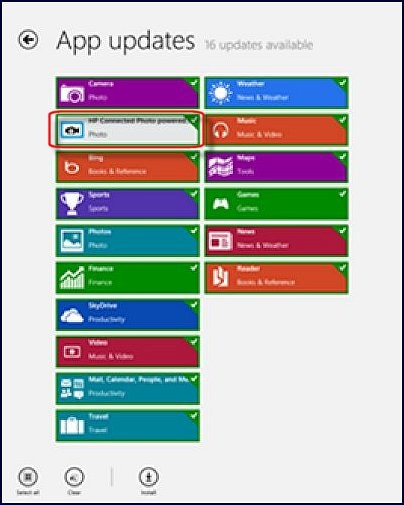
See App updates. If available under App Updated, click the HP Connected Photo and follow any on-screen instructions.
Figure : App updates

Updating version 2.1
If you have HP Connected Photo version 2.1, use the following instructions to update to the latest version:
-
Click the Store tile.
Figure : Store tile
-
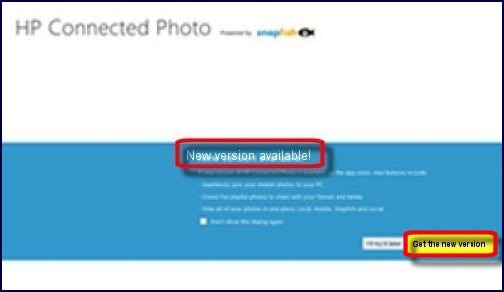
When there is an update available, the New version available! box is displayed. Click Get the new version.
Figure : New version available
-
All the available updates for your apps are displayed. Either select HP Connected Photo to update the app, or click Install to install all the available updates.
Figure : App updates with HP Connected Photo selected
-
The latest HP Connected Photo starts. To open the app, click Get started
Figure : Getting started

Creating a Snapfish account in Windows 8
To create a Snapfish account, use the following instructions:
-
From the HP Connected Photo screen, in the Snapfish box click Sign in or create an account.
Figure : HP Connected Photo

-
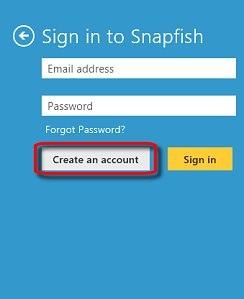
Under Sign in to Snapfish, click Create an account.
Figure : Sign in to Snapfish
-
Fill out the information and click Start.
Figure : Sign up for Snapfish

-
Follow any on-screen instructions.
Uploading photos to Snapfish or Facebook in Windows 8
To upload your photos to Snapfish or Facebook, use these instructions:
-
From the HP Connected Photo screen, follow the instructions below.
-
The first time: To upload you photos the first time after creating your Snapfish account, click Upload your own photos now.
Figure : Uploading Photos the first time

After initial uploading: Uploading photos after the first time, HP Connected Photo displays personal photos. Click Local Photos to view and upload your photos.
If you already have a Snapfish account, you do not have to upload your photos into HP Connected Photo. All of your photos in Snapfish will be accessible to you through HP Connected Photo.
-
-
Click the photo album that has the pictures you want to upload to Snapfish.
Figure : Photo library

-
Right-click the photo images you want to upload to your Snapfish account. Then click Upload.
Figure : Photo album

-
Select the destination for the uploading files. Click the arrow to see the destinations available.
Figure : Upload to

-
Select (in this example) from Snapfish or Facebook.
Figure : Upload to...

Follow any on-screen instructions to complete the upload.
Creating personalized photo cards
You can create personalized photo cards for any occasion. Use the following instructions:
-
On the HP Connected Photo page click Create Personalized photo cards.
Figure : HP Connected Photo

-
Select a card category from the available choices.
Figure : Select a card category

-
Select a card template from the selected category.
Figure : Select a card

-
Next, the Customize your card screen is displayed.
Figure : Customize your card

-
Customize your card by adding or changing the color. Click Color.
note:
You must edit the color and layout before adding pictures or text to the card, or the layout and color will be lost.
Depending on the card being created, not all of the toolbar selections are available. Some cards do not have text boxes to add text, some do not have the option to change color fields, nor are you able to change the layout on some cards.
Figure : Toolbar

-
Select the color you want.
Figure : Color selections

The card is displayed with the new color.
Figure : Card with new color

-
To change the orientation from horizontal (landscape) to vertical (portrait) use the Layout button.
Figure : Layout

-
Add text and modify text using the toolbars at the bottom.
Figure : Customize your card

To add text to the card, click Text on the toolbar and select the color.
Figure : Toolbar text and color

Highlight the text in the text box and type in your own name or message.
Select the font you want.
Figure : Fonts

-
To add a photo to the card, click the plus sign (+) in the middle of the page at under the card being created and then click Photo.
Figure : Menu bar

Select the photo(s) for your card, and then click Add Photos.
Figure : Select Photo for Your Card

-
Rotate the photo and resize it with the following toolbar selections:
Rotate the photo left or right.
Figure : Rotate buttons

To zoom in or zoom out use the plus and minus resize buttons.
Figure : Resize buttons

After creating the card you are ready to print or order the cards.
Ordering prints to ship to your location or for in-store pickup (US Only)
After creating the card, you can order prints to be delivered to an address or you can have them printed and pick them up at a local store (US Only) .
To have your prints delivered to your home, use the following instructions:
-
In the Delivery Method screen, select Ship to New Address.
Figure : Delivery Method

-
Fill in the address fields and click next in the lower right corner of the page.
Figure : Shipping address

-
Enter your billing information, including the name on the credit card, credit card number, and expiration date. Click the button in the upper right corner to On to use your shipping address as the billing address.
Figure : Billing Information

-
Click Next in the lower right corner of the page.
-
The cards are uploaded.
Figure : Uploading your selected cards

-
The order is processed.
Figure : Processing your order

-
Review your order, the shipping and billing information, and click Place Order.
-
Print the receipt to keep for your records.
To have your cards or photos printed at a local store (US Only), use the following instructions:
-
In the Delivery Method screen, select Pickup in Store.
Figure : Delivery Method

-
If the list of stores does not show a store close to you, enter your zip code in the field and click Next. Then select a store near your home.
Figure : Pickup in Store

-
A reminder is displayed, reminding you that you need to pay for the prints when you pick them up.
Figure : Reminder

-
Processing your order is displayed.
Figure : Processing your order

-
A receipt is displayed. Print the receipt for your records. Click View my cards to delete or to order more cards.
Figure : Receipt

-
From My Cards you can delete cards or order more.
Figure : My cards

Installing HP Connected Photo on an Android tablet
To install HP Connected Photo to your Android, use the following instructions.
-
On the Home screen, click or touch the All apps
 icon, and then click or touch the Play Store app.
 -
To search for HP Connected Photo, click or touch the search
 icon at the top of the page, and then type HP Connected Photo.
 -
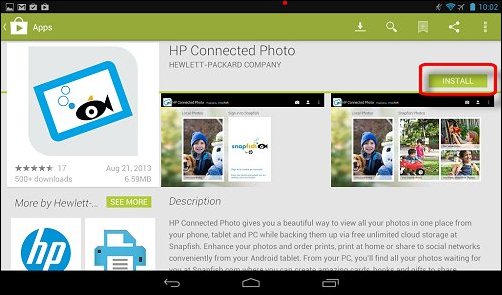
Click or touch the HP Connected Photo tile.
Figure : HP Connected Photo tile

-
Click INSTALL.
Figure : Install screen
-
If asked about App permissions, click ACCEPT. Wait for the app to install.
-
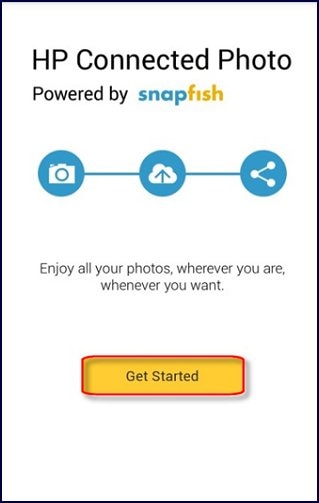
HP Connected Photo start screen is displayed. Click OPEN to get the Get Started screen.
Figure : HP Connected Photo

Creating a Snapfish account on an Android tablet
Follow these instructions to create a Snapfish account:
-
On the Home screen, click or touch the HP Connected Photo icon.
-
Click or touch Sign in or create an account.
Figure : Sign in to Snapfish

-
On the Sign in to Snapfish page, click Create an account.
Figure : Create an account

-
Click Sign Up in the upper right corner.
Figure : Sign Up

-
Fill in the required fields to create an account and touch or click Create an account.
Figure : Fields to create a Snapfish account

-
Read and agree to the Online Privacy Statement.
Figure : Privacy statement

-
Follow any on-screen instructions.
Uploading photos to Snapfish on an Android tablet
Use the following instructions to upload local photos to Snapfish on your Android .
Make sure you are signed in to your Snapfish account and follow these instructions:
-
On the HP Connected Photo page, click or touch Local Photos.
-
Select the album from the time line.
Figure : Album time line

-
With the album open, touch or click the photo to be uploaded to your Snapfish account.
Figure : Flowers album

-
Touch or click the photo to be uploaded to Snapfish.
-
Click or touch the Share icon.
Figure : Photo with Share icon

The progress of the upload is displayed, and then Uploaded to Snapfish successfully is displayed when the upload is complete.
Installing HP Connected Photo on an Android phone
To install HP Connected Photo on an Android phone, use the following instructions.
-
In the Google Play Store, find and select HP Connected Photo.
-
Touch Install. Read and accept the app permissions to begin installing the app.
Figure : HP Connected Photo for Phones

-
When the app is installed, touch open on the app page or touch HP Connected Photo in your app list to open it.
-
Touch Get Started.
Figure : Get Started
-
It you already have a Snapfish account, sign in using your email address and password. It you do not have an account, touch Create an account to make your own Snapfish account.
Figure : Create an account

-
Fill in the necessary fields, read Terms & Conditions, and then touch to put a check in the check box to verify understanding the terms and conditions, and then touch Get Started.
Figure : Sign up for Snapfish

Uploading your photos to Snapfish on an Android phone
To upload your photos to Snapfish, use the following instructions:
-
Touch the HP Connected Photo app in your apps list.
-
On the HP Connected Photo screen, touch Get Started.
Figure : HP Connected Photo
-
Sign in to your Snapfish account if you are not already signed in.
Figure : Sign in to Snapfish

-
On the Photos screen, touch Local to access the photos stored locally on your phone.
Figure : Photos

-
The Local photos screen displays a selection of images from the photo folders stored on your phone. Scroll up or down to view more folders. Locate the album that contains photos you want to upload, and touch the album name to select.
Figure : Local photos

-
In the selected album, touch the checkmark at the top of the screen.
Figure : Local album with the checkmark selected

-
Select the desired photos, and touch the upload icon at the bottom of the screen.
Figure : Photos selected

-
On the upload screen, touch HP Connected Photo to view the up loading progress screen.
Figure : Upload screen

-
When the photos are successfully uploaded, touch either View all to view the uploaded files, or touch Close.
Figure : Uploading complete

Setting Auto upload and other settings
To set Snapfish to auto upload your photos, to find account name, or to see information about HP Connected Photo, use the following instructions.
To set auto upload:
-
To set the auto upload feature, touch the three-dot overflow button on the action menu and then touch Setting.
Figure : Three-dot overflow button and Setting selected

-
To turn on the auto upload feature, touch the ON button in the Auto Upload box. Your new photos will be automatically uploaded to your private Snapfish account.
To turn off, or disable the auto upload feature, touch Off in the Auto Upload box.
Figure : Setting for Auto Upload

To find the account name or to sign in or out of your account use the following instructions:
-
To see the account name, touch the overflow button and then touch Account.
Figure : Overflow button and Account selected

-
Touch the On button to display the login screen. You will be prompted for your account and password to login to Snapfish. When logged in to Snapfish, touch Off to logout and close Snapfish.
Figure : Account information

To find the About screen with links to Customer Support and Terms and Conditions use the following instructions:
-
To access the About screen, touch the overflow button and then touch About.
Figure : Overflow button and About selected

-
The About information screen is displayed. Links to Customer Support and Terms and Conditions are available on the about screen.
Figure : The About screen

FAQS
Use one of the following sections to answer your question:
What devices are supported with HP Connected Photo?
HP Connected Photo is available for Windows 8 desktops and tablets, as well as android phone and tablets. Additionally, an HP Connected Photo companion app from Snapfish is available for the iphone and ipad devices.
Go to Download HP Connected Apps to download HP Connected Photo or the Snapfish app for iphone and ipad devices. On the Download HP Connected Apps page, click the HP Connected Photo link to go to the section with the downloads.
Figure : HP Connected Photo downloads

How is HP Connected Photo different from other photo apps?
Only HP Connected Photo lets you access your photos from multiple sources, such as your computer hard drive and social media sites like Facebook and Snapfish - across multiple systems. You can also easily print, create photo projects, buy, and share your photos. HP Connected photo also provides you with unlimited photo storage at full resolution.
Photo products and prints can be ordered online through Snapfish in North America only. You can print at home or print to any web-connected printer, anywhere.
Will this sync with my phone?
Yes, HP Connected Photo is available for Android smartphones. The Snapfish companion app is available for iPhones.
Your photos from Snapfish automatically sync twice a day to your other devices with HP Connected Photo.
Is there an app for Windows 8 phones?
HP Connected Photo is not available for Windows 8 phones at this time. It is available for Windows 8 desktops and tablets, as well as android phone and tablets. Additionally, an HP Connected Photo companion app from Snapfish is available for the iphone and ipad devices.
Go to Download HP Connected Apps to download HP Connected Photo or the Snapfish app for iphone and ipad devices. On the Download HP Connected Apps page, click the HP Connected Photo link to jump to the section with the downloads.
Figure : HP Connected Photo downloads
I have Windows RT; will HP Connected Photo work?
Windows RT uses an Arm processor which is currently not supported by HP Connected photo.
What if I forget the password to my Snapfish account on my phone?
If you forget the password to your Snapfish account, follow these instruction:
-
At the Sign in to Snapfish screen, click the question mark ?.
Figure : Sign in to Snapfish

-
On the Forgot your password? screen, type your email address, click Submit, and a temporary password will be sent to you.
Figure : Forgot your password?

How do I turn off the auto upload on my phone?
To turn off the auto upload feature on your Android phone, go to the Setting screen to make the change. For detailed instructions see Setting Auto upload and other settings.
How do I sign in to Facebook?
Click the Facebook tile and then sign in. If you do not have a Facebook account, click create an account and follow the on-screen instructions. Once the account is created, you can sign in to Facebook photos.
How do I access my local photos?
To access your local photos, click the Local Photos tile on the HP Connected Photo home page. The app provides you with access to the photos in your Pictures directory.
What image formats are supported by HP Connected Photo?
HP Connected Photo supports only images in JPEG (.jpg) format.
What is an album?
An album is a group of pictures in a folder. Albums can reside on your local computer, in your Snapfish Photo account, or on a social network account like Facebook or Ren Ren. Click the album to open it and view the photos.
How do I upload an album?
Select the album to upload and then click Upload from the lower menu. Next, choose where to upload the album from the drop-down menu. You can choose Snapfish or any social network site connected to HP Connected Photo. Next click Upload. An Uploading photos status screen will display the status of each image being uploaded. From this screen you can Upload more, Stop uploading, or Retry the upload.
How many photos can I upload to my Snapfish space?
Snapfish currently provides unlimited storage for you to uploaded your photos.
When will my pictures appear on other Snapfish devices
Your photos from Snapfish automatically sync twice a day to your other devices with HP Connected Photo.
How do I edit the photos?
While viewing a photo from your Snapfish Photos, right-click the photo to see the menu bar at the bottom of the screen, or on Windows 8 devices, swipe from the bottom of the screen to see the menu bar. Click Edit. Another menu bar is displayed.
The first options on the menu bar are used after making changes with the other options on the menu bar. With these options, you can Undo or reverse the changes you make, and with Redo, you can again see the changes. Original shows a copy of the original image without any of the edits. You can choose to save the edits or not. Make the desired changes and click Save.
Figure : Undo, Redo, Original

You can Rotate, Resize, Crop, or Adjust Color of your photos. Click the icon for the desired operation, and an options bar appears with options for that operation. Make the desired changes and click Save.
Figure : Rotate, Resize, Crop, Adjust Color

You can change the look of the photo by using a Filter, adding Clip Art, Text, or a Border to your images. Click the icon for the desired edits, and an options bar is displayed. Make the desired changes and click Save.
Figure : Filter, Clip Art, Text, Borders

When viewing photos or albums in Snapfish, you can select the photos you want and select from the toolbar to perform various tasks. You can select all the photos at once, or you can view a slideshow of the selected photos, or you can print, order prints, or delete the selected photos.
Figure : Toolbar

Where are my edited photos saved?
After editing a local photo, the app will ask whether to overwrite the original photo or to save as a new photo. It will be saved locally in the same location as the original photo.
For edited online photos, the edited photo will be saved in a local album named Edited Photos.
On Android, all edited photos will be saved under a local album named Edited Photos.
Can I print my photos from my local printer?
Yes, you can print your photos to your local printer. When viewing the photo, click the Print button within the app.
How do I order prints of my photos?
note:The availability of features varies by country. These features are supported on Android and Windows 8 operating systems. Snapfish membership is required. Internet service is required, but it is not included.
Using the toolbar at the bottom of the Photo Library screen you can also order prints, print your photos, see the images in a slide show, or delete them. Select the photos and then click the appropriate icon on the toolbar. To select all the photos for one of the functions, click Select all.
To order prints for pick up through Snapfish in version 2.0 of HP Connected Photo use the following instructions (U.S. Only).
The process to order prints in Facebook is very similar.
-
Click the Order now button on the Create tile.
Figure : Create tile

-
Select the prints you want to order and click Next.
-
On the left, select the size of prints you want to order, and click Next.
-
In the Pickup in Store window:
-
If you have geo-enabled, the app will locate participating stores that Snapfish can transfer your photos to for printing and pick up.
-
If you are not geo-enabled, type in your address and the app will locate participating stores that Snapfish can transfer your photos to for printing and pick up.
-
-
From the list of stores, select the one where you want to pick up your photos, and click Next.
-
On the Review & Place Order window in the payment box review the quantity and price, and in the Delivery box make sure the correct store is selected and note the time of pickup.
-
If the order is correct click Place order.
Where are the synchronized mobile photos saved?
The mobile synchronized photos will be saved under My Pictures in the Library, under the HP Connected Photo sub-folder.
Where are the HP Connected Photo mobile apps that I can download for my Android tablet and phones?
Type HP Connected Photo on Google Play to find the versions that suit your Android tablet . HP Connected Photo has different design and feature sets for Android tablets and phones.
How do I sync the mobile photos from my phone to my PC?
Start by downloading one of the following apps depending on which you are using:
-
Android tablet - Download HP Connected Photo from the Google Play store.
-
iPhone or iPad - Download Snapfish app from the Apple App Store.
Continue for the specific instructions:
For Android tablets within HP Connected Photo, you can capture photos using the camera button at the top right corner of the app home page (not the system camera button), and the photos will be uploaded to your Snapfish account automatically.
For Android phone within HP Connected Photo, you can sync your mobile photos in either of the following two ways:
-
Use the in-app camera button that is on the top left corner of the app home page.
-
Open the auto upload function. You can enable or disable this function within Settings.
Your photos from Snapfish automatically sync twice a day to your other devices with HP Connected Photo.
Where can I see the mobile photos on Snapfish?
Access mobile photos in your Snapfish account for any of these albums:
-
Uploads from my Android tablet
-
Uploads from my Android phone
-
Mobile Uploads albums in Snapfish
How do I download my photos from Snapfish or other social media in Windows?
After selecting the photo(s) in HP Connected Photo, right-click the photo(s) to see the command buttons at the bottom of the page, click Download and follow the on-screen instruction to download the photos from Snapfish or other social network sites.
Why can't I see photos shared by my friends or family on Snapfish?
If you have not received an email from your friends or family on Snapfish, ask them to share photos on the Snapfish Web site after they sign-in to Snapfish.
If I live outside North America can I use HP Connected Photo?
Yes, you can use HP Connected Photo outside of North America. HP Connected Photo is fully localized for our customers throughout the world. All app features available in North America (except e-commerce through Snapfish), are available in most other parts of the world.
Please check the list in Why can't I order prints from Snapfish (below) to see if you are in a country where Snapfish and all its features are fully supported.
Why can't I order prints from Snapfish?
Currently ordering prints in Snapfish is only supported in selected countries.
If you are not in a country where ordering prints is supported, you will not see the Order Prints button.
Please check the list below to see if you are in a country where Snapfish and all its features are fully supported.
Countries where Snapfish features are fully supported
-
USA
-
Canada
-
United Kingdom
-
Ireland
-
Australia
-
New Zealand
-
Germany
-
Switzerland
-
Austria
-
France
-
Italy
For those using Snapfish in the countries where it is not fully enabled, you can order prints, cards, and other Snapfish products directly from the Snapfish Web site, or order selected products in HP Connected Photo. HP is adding new product offerings in HP Connected Photo occasionally, so it is important to install the latest HP Connected Photo updates.
Can I order photos if I do not live in a country that has full Snapfish capabilities?
Yes, you can order photos. For those not living where Snapfish is fully functional, you can still upload your photos to Snapfish and use it as your private photo cloud. You can order Snapfish products by international mail, or directly on Snapfish.com, which might result in higher shipping cost.
What should I do if I have not received email confirmation after placing my print order?
To check your orders go to Snapfish.com, login to your account, and click the Account link on the top menu bar of the Snapfish Web site to see your Recent orders. Contact customer service if necessary.
Where can I check my orders placed on HP Connected Photo
To check your orders go to Snapfish.com, login to your account, and click the Account link on the top menu bar of the Snapfish Web site to see your Recent orders.
How can I contact Snapfish customer service about the orders I placed in HP Connected Photo?
To contact customer service, please refer to the Snapfish Web site.
note:One or more of the links above will take you outside the Hewlett Packard Web site. HP does not control, nor is it responsible for the information outside of the HP Web site.
How To Download Pictures From Iphone To Snapfish
Source: https://support.hp.com/lv-en/document/c03921677
Posted by: bourgaultadind1951.blogspot.com
0 Response to "How To Download Pictures From Iphone To Snapfish"
Post a Comment